
The Nitty Gritty of Our Marble Checkerboard Floors
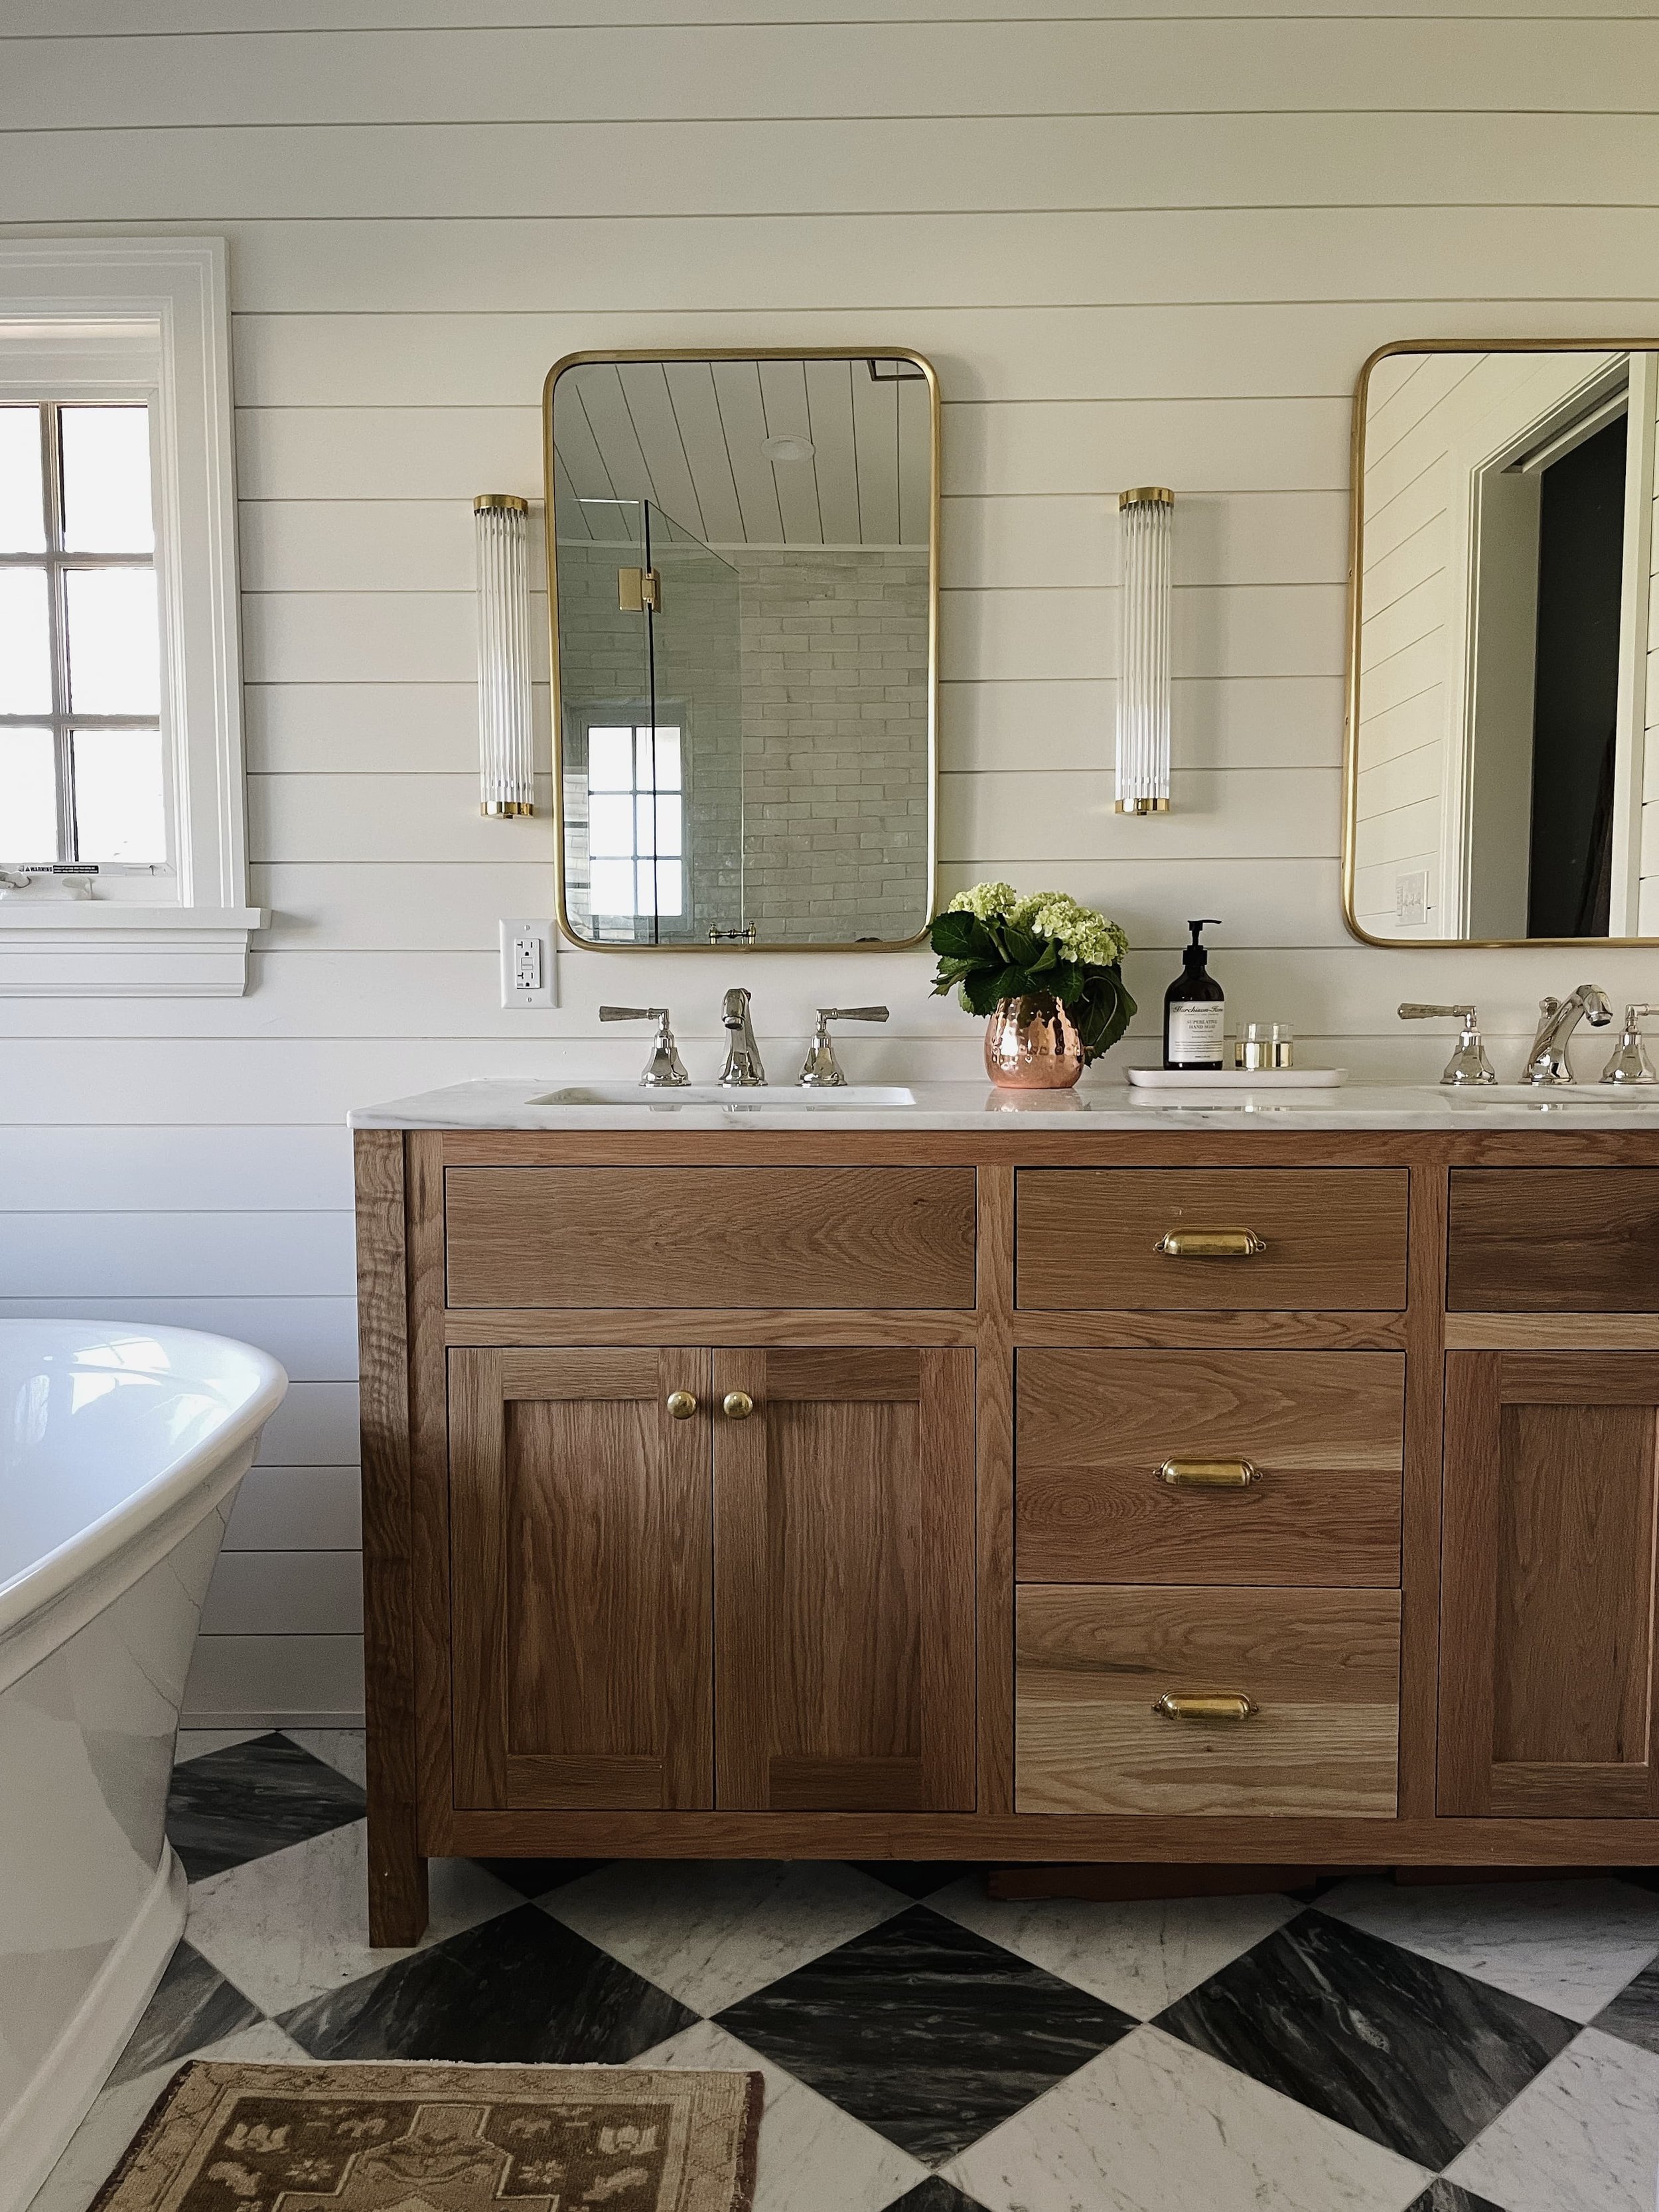
Our marble checkerboard floors are a crowd favorite and I get it — they’re gorgeous! They are one of my favorite design elements of our house and so I’m breaking down all the nitty gritty details so you can create a similar look!
Size
You can choose many different sized when creating a checkerboard pattern. We went with 12 x 12 tiles because the scale felt right for the size of our bathroom. Anything larger would have felt off and smaller tiles would have felt too busy int eh small space. To make the small footprint feel larger, we continued the checkerboard pattern into our shower.
Material
Most checkerboard floors that I see are created using marble or marble-look-a-like materials. I opted to use real marble in our bathroom because I just couldn’t find any comparison to the variation and beauty of real marble. I love the fact that the stone will change and patina over time. After all, if was good enough for the Ancient Greeks it’s good enough for me.
If you love the the marble tile look, but hate the price and the idea of dealing with soft stone, you can consider a ceramic or porcelain tile. They make many very realistic porcelain and ceramic tiles that give you a similar marble look.

Color
There are endless options when it comes to picking color for checkerboard tile floors. The most classic and common route is the black and white combo. We went for this classic look but with a softer vibe by using gray bardiglio marble and white carrara marble tiles. For a warmer effect, you can play with combing white tile with a taupe or beige tile. Or for a more colorful look mix together two totally different colored tiles — the options are truly endless!
Finish
Despite the natural elegance of our checkerboard floors, I wanted them to also have a casual, old-world feel, so I opted for a honed finish. These low to no shine tiles have a ‘lived-in’ look and the matte finish cuts down on any potential slipperiness.

Direction
Checkerboard floors can be laid in two directions. Traditionally, the checkerboard pattern goes diagonal to the walls. This causes triangles around the edges and give the tiles a diamond look. This is the direction we went with for our bathroom.
You can also lay checkerboard tiles in line with the walls. This gives a more causal, retro vibe to a space.
Grout
We used Mapei products for the grout used throughout our home. In my experience, their grout is superior to any brand sold at home depot or other hardware stories. For our checkerboard floors, I chose the color “silver” because it compliments the color of the stone without distracting from the natural beauty of the marble.

We went the traditional route for our checkerboard marble floors but I love seeing how people are putting a modern spin with all kinds of variations and styles. I included some other checkerboard combinations that I am loving lately! If only i had more room in our house!
